Showing posts with label Ubuntu. Show all posts

Tuesday, May 27, 2014

Install Ubuntu ATI Drivers| fglrx direct from AMD


amd.com

Install ATI Video Driver

The following are instructions to install the latest ATI Catalyst Video Driver (fglrx) in Ubuntu 12.04 LTS

Proceed with caution, as manually altering packages and drivers in Terminal, especially when working as a super or sudo user, can have negative impacts on some or all of your installed packages and drivers.

If you are installing these drivers on a fresh install of Ubuntu you may ignore the first step of the instructions; Delete/Remove Existing Drivers.

Delete/Remove Existing Drivers


sudo sh /usr/share/ati/fglrx-uninstall.sh
sudo apt-get remove --purge fglrx fglrx_* fglrx-amdcccle* fglrx-dev*
You will need to install the following dependencies via Terminal.
sudo apt-get install build-essential cdbs fakeroot dh-make debhelper debconf libstdc++6 dkms libqtgui4 wget execstack libelfg0 dh-modaliases
64-bit ONLY
sudo apt-get install ia32-libs-multiarch i386 lib32gcc1 libc6-i386

To install the lastest ATI/AMD driver, Download the appropriate driver for your machine here from the AMD/ATI Website and then enter the following into the terminal (remember to navigate to where you extracted the driver to beforehand and make sure no other .run files exist in that folder):


sudo sh *.run --buildpkg Ubuntu/precise

If it is required, a package manager window will open and install some dependencies and after a while create the following four .deb packages:


fglrx_8.961-0ubuntu1_amd64.deb
fglrx-amdcccle_8.961-0ubuntu1_amd64.deb
fglrx-dev_8.961-0ubuntu1_amd64.deb

Note: It will also create a file called fglrx-installer_8.961-0ubuntu1_amd64.changes. If you wish you can read this file to know the changes that have been affected through AMD/ATI Catalyst and related information. To install the created .deb files, type:

sudo dpkg -i *.deb

Note: In case any of the packages are broken, open Synaptic Package Manager and go to Edit -> Fix Broken Packages. In case you are new to Ubuntu, broken here means that some dependent packages are not yet installed. Once you sort out the issue as indicated above through the Synaptic Package Manager, the problem of broken packages should be resolved.

sudo aticonfig --initial

Now go ahead and reboot your computer. If all is right, the fglrx driver that corresponds to AMD/ATI Catalyst will be installed and working on your system. To confirm the drivers are working open a terminal and type:

fglrxinfo

You should get an output similar to the following:

display: :0  screen: 0
OpenGL vendor string: Advanced Micro Devices, Inc.
OpenGL renderer string: ATI Radeon HD 4300/4500 Series
OpenGL version string: 3.3.11631 Compatibility Profile Context

Note: If you see any mention of MESA in the output, the fglrx drivers have not been installed correctly. See the troubleshooting section for more details You can make configuration changes through the AMD/ATI Catalyst Control Center. It can either be found in your Application menu or you can launch it through a terminal like this:

sudo amdcccle

Be aware that when you manually install fglrx, this can subtly break your system, since the packaging system isn't made aware of your changes. The Launchpad developers get many bug reports from users who do this and then later discover after a few upgrades that their system starts behaving weird because of those fglrx remnants.


Officially Supported (Catalyst & Open Source)

The following hardware is supported by current releases of the Catalyst/fglrx driver. Open source
drivers will work as well.

* CEDAR       Radeon HD 5450
* REDWOOD     Radeon HD 5550/5570/5670
* JUNIPER     Radeon HD 5730/5750/5770
* CYPRESS     Radeon HD 5830/5850/5870
* HEMLOCK     Radeon HD 5970
* PALM        Radeon HD 6250/6310 
* SUMO,SUMO2  Radeon HD 6370/6380/6400/6410/6480/6520/6530/6550/6620
* CAICOS      Radeon HD 6430/6450/6470/6490
* TURKS       Radeon HD 6570/6670
* JUNIPER     Radeon HD 6750/6770
* BARTS LE    Radeon HD 6790
* BARTS       Radeon HD 6850/6870
* CAYMAN      Radeon HD 6950/6970  (requires Catalyst 11.4b; open-source requires kernel 2.6.39)
* ANTILLES    Radeon HD 6990


Older RadeonHD (Catalyst Legacy 13.1 & Open Source)


* R600        Radeon HD 2900
* RV610/RV630 Radeon HD 2400/2600, 3000/3100/3200/3300, M71, M72, M74, M76
* RV620       Radeon HD 3450/3470, M82  
* RV635       Radeon HD 3650/3670, M86
* RV670       Radeon HD 3850/3870, M88
* RS780       Radeon HD 3100/3200/3300
* RS880       Radeon HD 4100/4200/4290
* RV710       Radeon HD 4350/4550/5145/530v/545v, M92
* RV730       Radeon HD 4650/4670/5165/550v/560v/565v, M96, M96-XT
* RV770       Radeon HD 4850/4870, M97, M98


Radeon (Catalyst <= 9.3 & Open Source)


* RS400/RS480 Radeon XPRESS 200(M)/1100 IGP
* R300        Radeon 9700PRO/9700/9500PRO/9500/9600TX
* R350        Radeon 9800PRO/9800SE/9800
* R360        Radeon 9800XT
* RV350       Radeon 9600PRO/9600SE/9600/9550, M10/M11
* RV360       Radeon 9600XT
* RV370       Radeon X300, M22
* RV380       Radeon X600, M24
* RV410       Radeon X700, M26 PCIE
* R420        Radeon X800 AGP
* R423/R430   Radeon X800, M28 PCIE
* R480/R481   Radeon X850 PCIE/AGP
* RS482       Radeon (Xpress) 200
* RV505       Radeon X1300, M52, M62
* RV515/RV550 Radeon X1400/X2100/X2300, M54, M64, All-In-Wonder 2006
* RV516       Radeon X1500
* R520        Radeon X1800, M58
* RV530/RV560 Radeon X1600/X1650/X1700/X2500, M56, M66
* RV570/R580  Radeon X1900/X1950, M68
* RS600/RS690 Radeon (Xpress) X1200/X1250/X1270
* RS740       Radeon (Xpress) 2100
* FireGL T2 (4154)
* FireGL V3100 (5B64)
* FireGL V3200 (3E54)
* FireGL V3300 (5E49)
* FireGL V5000 (5E48)
* FireGL V5100 (5551)
* FireGL V7100 (5550)
* FireGL X1 (4E47)
* FireGL X2-256/X2-256t (4E4B)
* FireGL X3-256 (4A4D)
* FireGL Z1 (4147)


Sources:
http://wiki.cchtml.com/index.php/Hardware
AskUbuntu
AMD

Wednesday, October 2, 2013

Install FTP Server in Ubuntu for Cloud Computing

Use Ubuntu FTP server to allow users to upload and download files remotely

Use an old PC as an FTP server for Cloud

Do you have a desktop that is left on all 24/7? Do you have an old computer lying around with an outdated processor you think is useless? Are you looking for some way to repurpose your old outdated desktop or laptop? All you need is a desktop computer with available hard drive space and you can set up your own, personal and secure cloud server. There are a few IP protocols that can be used for this. In this post you will learn how to set up an FTP based cloud server using your old and outdated desktop or laptop. The reasons to use an outdated PC are numerous however, the main reason being that serving data to only a few users does not require nearly as many system resources as running applications as a single user with a GUI front-end.
--> File Transfer Protocol (FTP) is a TCP protocol for uploading and downloading files between computers. FTP works on a client/server model. The server component is called an FTP daemon. It continuously listens for FTP requests from remote clients. When a request is received, it manages the login and sets up the connection. For the duration of the session it executes any of commands sent by the FTP client.


FTP Server Installation - VSFTPD

vsftpd is an FTP daemon available in Ubuntu. It is easy to install, set up, and maintain. To install vsftpd you can run the following command:
sudo apt-get install vsftpd

Anonymous FTP Configuration

By default vsftpd is configured to only allow anonymous download. During installation a ftp user is created with a home directory of /home/ftp. This is the default FTP directory. If you wish to change this location, to /srv/ftp for example, simply create a directory in another location and change the ftp user's home directory:
sudo mkdir /srv/ftp
sudo usermod -d /srv/ftp ftp

After making the change restart vsftpd:
sudo /etc/init.d/vsftpd restart
Finally, copy any files and directories you would like to make available through anonymous FTP to /srv/ftp.

Configure FTP Server

  • FTP Server configuration is done by editing the /etc/vsftpd.conf file.
  • To edit this file type the following command in Terminal:
gksu gedit /etc/vsftpd.conf

Disable Anonymous FTP

Change the line:
anonymous_enable=YES

to:

anonymous_enable=NO

Allow Local Users to Connect

Add:

local_enable=YES

Allow Users to Upload files

Add:
write_enable=YES

Open port on Router

Now all you need to do is open up port 21 in your router so that your ftp server will be available to users outside your local network. It can be accessed using the IP address assigned to you by your ISP.

Friday, September 27, 2013

Logic Pro for Ubuntu Linux ? | Best Music Production Apps for Ubuntu | DAW Software for Ubuntu

screen shot of  Logic Pro X on iMac

Is there software like Logic Pro for Mac available for Ubuntu?


Most avid hobbyist musicians out there have likely heard of, or used, Logic Pro for Mac. This is one of many industry standard application for music creation; in fact it is even required by some college music programs. So you may be wondering, Is there anything like this for Ubuntu?

Well, yes, and a huge, resounding No! There are various Linux applications for music production but, nothing comes close to matching Logic Pro.

Digital Audio Workstation (DAW) Alternatives for Logic Pro, Cubase, or ProTools for Ubuntu:


Wednesday, August 14, 2013

Ubuntu Edge, the campaign, and WHY it may be in TROUBLE.


Ubuntu Edge.

The next generation smart phone is upon us. Ubuntu Edge will be one of the first smart phone designs to cross the barrier between personal computing and personal telephone use, giving users a pocket computer that is able to make phone calls. Design no doubt takes after the ground breaking iPhone design; attention to detail, practical durability, and sleekness, which Apple prides themselves on. Software development for the Ubuntu Edge however, will fall far far away from the distribution and authentication norms currently visible with the iPhone and Apple App Store. The operating system on the Edge will likely mimic that of the Android OS, giving users hack-ability and customization opportunities; the roots of open source Linux software.

The Ubuntu Edge case will be precision engineered and will feel like a good solid peace of hardware. The canonical logo, circle of friends, is elegantly embossed on the rubberized backing of the smart phone. Size wise, the Edge is slightly smaller than a Samsung Nexus 4 and Samsung Galaxy Nexus. It is slightly larger in size than the Apple iPhone 4.

It will have the fastest multi-core processor on the market, as well as boasting 4 GB of ram and 120 GB of storage, excellent for carrying around music, videos, and applications. These incredible hardware specifications will allow the phone boot a fully functioning Ubuntu OS as well as Android, making it the first dual-booting device on the market. The Ubuntu Edge will also come with an 4.5" HD Screen at 1280 x 720 pixels protected by a super hard Sapphire Crystal display. It has an 8 mega-pixel low light camera on the back and a 2 mega-pixel front camera.

As far as the connectivity is concerned it will have 4G LTE, 802.11 N Wi-Fi, and Bluetooth 4.

Saturday, July 6, 2013

Mount a Samba smb shared folder Ubuntu

UbuntuLinux Guide
The contents you are looking for have moved. You will be redirected to the new location automatically in 5 seconds. Please bookmark the correct page at http://www.ubuntulinuxguide.com/blog/mount-samba-smb-shared-folder-ubuntu.html
AskUbuntu

SMB Sharing


One of the easiest and most common ways to connect, network, and share files and folders between Ubuntu and Windows computers is to configure a Samba File Server on the Ubuntu computer. This method of file sharing makes it easy for anyone to learn how to share files between computers using linux systems. Samba may not be included with the Ubuntu package but can easily be downloaded from the software center or using the apt-get command. The Samba file server is configured initially to share files with any user on the network without requiring a password, however password required access can be configured.

For Ubuntu operating systems before 12.10 you have to use the "classic" syntax to identify the server and share to the client computer. You can not mount a folder within a share as though it is a share, you should mount the share and then access the folder within it. A symbolic link to the folder can be made if necessary. When you run  smbmount,mount -t smbfs  or similar remote mount commands as  root (for example with sudo you need to specify the username on the server (unless it's actually  root , which is unlikely and, if the server runs a Unix system, not recommended.


Follow the instructions below to install Samba SMB:


Search Software Center for "samba."
Samba download in Ubuntu Software Center

Click Install, Enter your administrative password, and wait for Samba to install.
Installing Samba from Ubuntu Software Center

Search for Samba in dashboard.
Searching for samba in the dashboard
Open Samba and choose a folder to share by typing in the path or browsing.
Choosing a folder to share with samba smb writable visible

Choose the Access tab at the top of the window and allow access to the shared folder for everyone or only specified users.

Allow access by everyone or specific users to samba shared folder


Mount a Samba (smb) Shared Folder on Local Network:


Open the home folder and Browse Network.
Browsing local network for network smb folder

Find the computer or device sharing the folder.

Double-click on the folder you would like to mount.
Mounting samba share on local network


Mount Samba shared folder in Terminal:


So first, you'll create a folder (mount point) for the share:
 sudo mkdir /mnt/projects 


(This is assuming you want to create it in /mnt. It's become more common to create all globally accessible mount points that aren't part of your Ubuntu system itself in /media instead of /mnt but it's fine to use /mnt if you like.)
Then use a command like this to mount the share:
 sudo smbmount //192.168.2.28/projects /mnt/projects -o user=USERNAME 

Replace USERNAME with the username on the Samba server that you need to log in as. You'll be prompted for your password. You can specify your password on the command-line too (with -o password=PASSWORD) but it will appear in cleartext in the Terminal and will go into your command history, so you probably don't want to do that.
You'll notice that I've used smbmount but mount -t smbfs or mount -t cifs (or mount.cifs) should work just as well, if you prefer.
Now smb://192.168.2.28/projects's contents are accessible in /mnt/projects. If you need to be able to access the contents of smb://192.168.2.28/projects/myProject in/mnt/projects/myProject, you can create a symbolic link:
 sudo ln -s /mnt/projects/myProject /mnt/myProject 


For readers of Ubuntu 12.10 and later:


You must use mount.cifs or mount -t cifs(smbmount and mount -t smbfs are no longer provided). These commands will work on earlier systems too.

Related:


Source: StackExchange: AskUbuntu Original Author: Eliah Kagan

Friday, June 28, 2013

Static background noise: Ubuntu 13.04, Kubuntu 13.04; Intel-HDA & ALSA sound driver

A recent update to the pulseaudio package included with Ubuntu 13.04 (Raring Ringtail) and Kubuntu 13.04 may be causing some users to experience a persistent background noise, or hum. It appears that this particular bug will affect VLC, Skype, and possibly other applications which emit audio. This problem is primarily affecting Intel-HDA (high definition audio) chipsets and ALSA sound drivers in regards to "glitch-free" PA (pulse audio).

Below is the current suggested workaround. It requires you to modify a line in the default pulse audio configuration file.

  1. Modify the following line in /etc/pulse/default.pa:                                                                                
    fix ubuntu 13.04 kubuntu 13.04 static background noise; gedit /etc/pulse/default.pa
    (Start a session of Terminal and use gedit to edit the pulse audio file.)
       
  2. In line 53 of /etc/pulse/default.pa change use_ucm=0 to tsched=0 
     
Edit line 53 of pulse audio default.pa file Ubuntu 13.04
(The line to edit is line 53)

3. Save Edits and Close the default.pa file.

**bug 751265

Thursday, February 28, 2013

How to move the Unity launcher; Ubuntu 11.10 12.04 13.04

UbuntuLinux Guide
The contents you are looking for have moved. You will be redirected to the new location automatically in 5 seconds. Please bookmark the correct page at How to move unity launcher in Ubuntu
unity launcher in ubuntu 12.04 in original position
Can I move the Unity Launcher?

If you are like some Ubuntu users who find it hard to get used to the new Unity system, you may appreciate the ability to move the launcher from the left part of the screen to the bottom. For some users this makes Ubuntu more familiar by placing the launcher on the bottom of the screen, similar to OS X.

Use a dock-style launcher (Cairo GLX-Dock):

To alleviate one of the biggest issues users have with the Unity Desktop for Ubuntu, the inability to move the launcher to the bottom of the screen, we will add a new launcher application. What I will show you here does not necessarily move the launcher, but rather a third-party application is used to create an entirely new Dock-Style launcher similar to OS X, at the bottom of the screen. The official Unity launcher can simply be hidden afterwards.

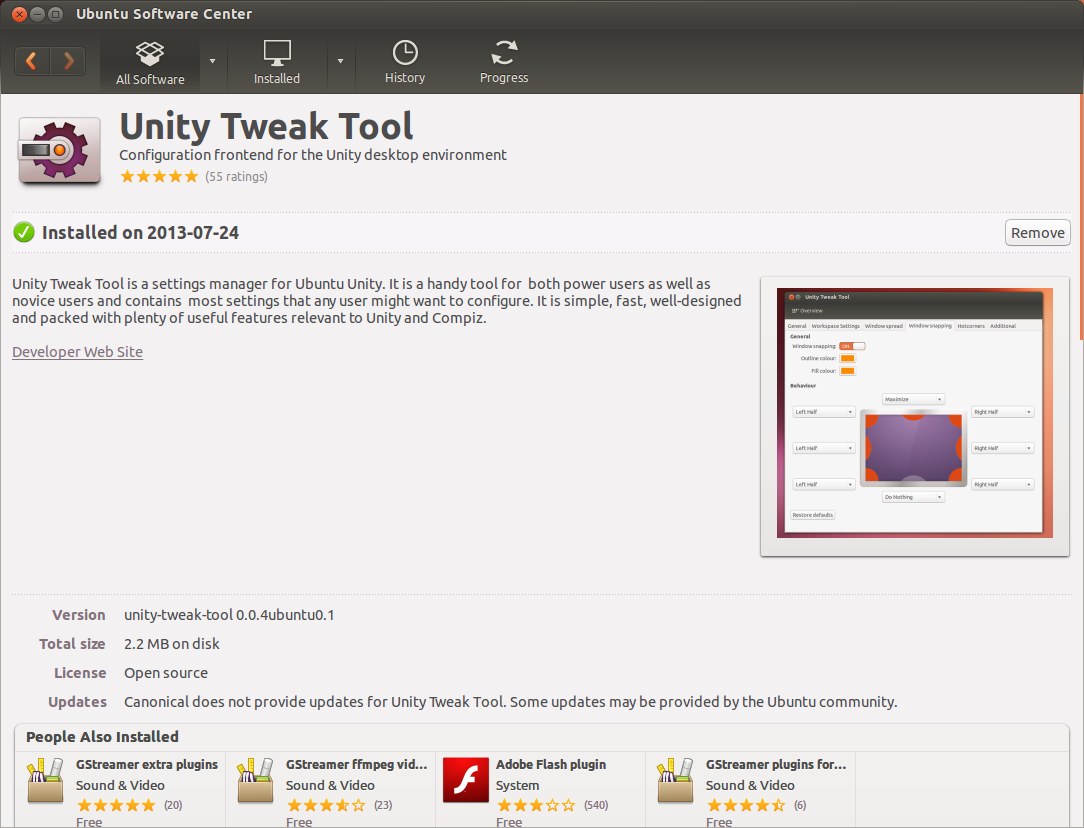
Unity Tweak Tool from Software Center
From the Ubuntu Software Center we will download and install Unity Tweak (optional) and Cairo GLX-Dock. To do this simply open up the software center and search for "Unity Tweak", and then run a search for "GLX".
The Unity Tweak tool will only be used to hide the Unity launcher and make the Panel transparent. There are other, native ways, to hide the Unity launcher so this application is not absolutely necessary, but is a nice tool to have.

Cairo-Dock from Ubuntu Software CenterGLX-Dock (Cairo-Dock with OpenGL) is the third-party application which will be responsible for adding the OS X like dock to the bottom of the desktop screen. This application has built in support for OpenGL which will enable hardware acceleration when possible to minimize the load on the CPU. The application also includes a workspace switching, auto hiding toggle window, which can be removed.

After both applications have been installed open GLX-Dock from the applications menu. Here you will have the option to choose Cairo-Dock with OpenGL or without. As soon as the application is opened your new dock should appear at the bottom of the screen.
Ubuntu launcher on bottom. Dock like launcher on bottom

Now if you would like to hide the orignial Unity launcher to avoid confusion and cleanup the look of the desktop you may. The auto hide launcher function can be found in System Settings --> Appearance --> Behavior.

The workspace switch can also be removed by right clicking on it and choosing not to use it.

Ubuntu 11.10:

If you are using Ubuntu version 11.10 you are in luck. There is an unofficial Compiz Plugin that will allow users to move the 3D Unity luancher from the left to the bottom of the screen. However, this unoffical plugin will not move the 2D unity launcher. Also, as with any unofficial plugin, it will probably have many bugs that still need to be worked out so it would be unwise to become reliant on this plugin for daily operation.

Install the PPA: ppa:paullo612/unityshell-rotated

The packages to install are unityshell-rotated libnux-1.0-0

A new plugin, Ubuntu Unity Plugin Rotated, will be made available in CCSM.

There is a much possibility for freezes on installation. If/when this occurs use CTRL + ALT + F1 to start a TTY. Then login and restart lightdm with sudo service lightdm restart. Rerun ccsm to enable the new plugin.

This plugin will replace the official Unity Plugin so users will not receive further bug fixes and updates from the Ubuntu development team.


Ubuntu 12.04:

As of 12.04 you can not move the launcher, and there’s no official support for that.
This is by design, and so far, there are no Canonical plans to change that. Here’s a quote from Mark on the bug report for Ubuntu 11.04:

I think the report actually meant that the launcher should be movable to other edges of the screen. I’m afraid that won’t work with our broader design goals, so we won’t implement that. We want the launcher always close to the Ubuntu button.

I interpret that as a stand that a consistent design must be experienced as a Unity (pun intended), or it won't work at all.

While I personally disagree with Mark’s/Canonical’s decision not to provide a way to move the launcher (please read my final note on this), I do understand the design choice: it truly makes sense for it to be on the side and not at the bottom. Most users today have a widescreen monitor, and virtually all monitors for sale, specially for end-user consumer market, are widescreen too. That means the vast majority of users have lots of extra horizontal space (mostly underused), while vertical space is premium.

Most apps and websites do not use your whole screen width (check the large vertical background bars in both sides of screen of Ask Ubuntu, for example). But they do use the full vertical length (actually, they scroll 3, 5, 10 times your screen height). Meaning lots and lots of scrolling. And then you subtract title bar, menu bar, favorites bar, tabs bar, etc., all of them sucking up your precious vertical space. So adding the launcher on top/bottom would make things even worse, while there’s plenty of extra, “idle” horizontal space.

There is an ongoing, strong movement in app development, specially browsers, towards reducing the number of bars and merging them together. Think about how Firefox changed in this regard in the last few years. So it makes sense for an OS to do the same.

True, Windows’ panel is a well-crafted one… but the design choice of Unity to put it at side and not the bottom is a wise one, once you get used to it. And it’s worth doing so. Your mouse wheel will say thanks ;)

That said, some important notes:
  • I am just expressing Mark’s/Canonical’s statements and point of view. While I do understand the design choice, and I do agree with a side launcher, I certainly do not agree with the decision of not being able to move it. But I’m just a messenger. Don’t shoot the messenger.
  • There are unofficial, third-party packages that allow you to move the launcher. This other answer covers that in great depth.
  • You can, at least, have some control over the launcher in a multi-monitor setup
Source: StackExchange

Related Posts Plugin for WordPress, Blogger...